About WiFi Extenders
WiFi Extenders are designed to boost your modem’s WiFi signal to reach more of your home or office. They work with your 2degrees Broadband modem or with another Extender to create a Mesh WiFi network around your house.
In this article
Things to know about WiFi Extenders
If you’re dealing with WiFi blackspots in your home, or maybe you lose signal in an upstairs bedroom, you might find that a WiFi Extender increases your wireless network range.
A WiFi Extender helps:
- Tackle WiFi blackout zones around your home, bypassing walls and building materials that can block WiFi signal
- Significantly increase WiFi range; it can even expand into your backyard, so you can stream videos in your shed, or keep the sleepout connected
- Maintain a stable signal and experience faster streaming speeds on all your wireless devices
Check if your modem is compatible with the WiFi Extender
- First, find out what modem you’ve got
Head over to our Quickstart Modem Guides to figure out your modem make and model. That’s the first step to knowing what kind of extender will play nice with it. - Not all extenders are created equal
Each modem provider will have it’s own extender that it’s most compatible with. Most modem brands work best with extenders from the same brand. So if you’ve got a TP-Link modem, a TP-Link extender is usually your best bet. If in doubt, it’s best to double check in store when purchasing the extender. - Where to grab one
You can pick up WiFi extenders from a few places, including:- The Warehouse
- JB Hi-Fi
- Noel Leeming
- PB Tech
- Harvey Norman
Note:For BYO modems, compatibility depends on the model you’re using. You may need to do some research or contact the manufacturer to find the right extender. More info on BYO modems here.
I have a Fritzbox Extender I purchased from 2degrees
The 2degrees Fritzbox WiFi Extender is compatible with the following legacy Fritzbox models:
- Fritz!Box 7490
- Fritz!Box 7560
- Fritz!Box 7590
- Fritz!Box 7530
These models are no longer widely used and have been phased out. Most newer 2degrees modems, including the Orbi, are not compatible with the Fritzbox extender. However, Orbi is a high-performance mesh-capable modem designed to provide seamless WiFi coverage across larger homes—often removing the need for a separate extender.
If you’re unsure about your setup or need help improving your WiFi, contact our Customer Care team at 0800 022 022.
Wifi Extender FAQs
2degrees WiFi Extender
1x LAN or Ethernet cable
1x power cable
WiFi quality light
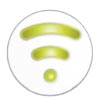 |
On |
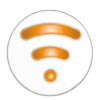 |
On Flashing |
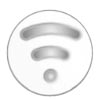 |
Off |
Connection light
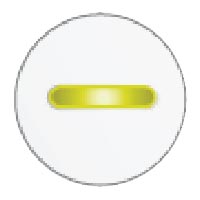 |
On Flashing slowly Flashing quickly |
Step 1
Plug your extender into a power socket in the same room as your modem. The Connection light will start to quickly flash green. Wait for the flashing to slow down – this will take a minute or so.

Step 2
Press the Connect button, the green light will start quickly flashing again

Step 3
Quickly go to your 2degrees modem and within 2 minutes, follow step a or b below – depending on which modem you have
- If your modem has a Connect/WPS button, press it once briefly. You’ll see the following lights flash together: Connect/WPS, Fon/DECT and WLAN.
- If your modem has a WLAN/WPS button, hold it down for about six seconds until the WLAN and DECT lights flash together

Step 4
After about 30 seconds, the Connection and WiFi Signal lights on your WiFi Extender will light up steadily (no flickering), which indicates that your WiFi Extender has successfully connected to your modem.

Step 5
Positioning your WiFi Extender to get the most from your WiFi
Once your connection has been set up for the first time, you’re ready to move the WiFi extender to the best spot to improve your WiFi range.
Unplug the power plug (don’t worry, the device will pick the connection back up), and move the device to roughly halfway between your modem, and the area where you start to see WiFi connection problems. It should be placed somewhere you still have a good WiFi signal.
The manufacturer of your WiFi extender has a handy app which can help find the best spot to position it. Scan the QR codes, or search ‘Fritz WLAN’ in the Google Play or Apple App store.
Once you’ve downloaded and setup the Fritz!App WLAN app:
- Click My repeaters.
- Click Evaluate repeater position.
- Move your WiFi extender following the app instructions.


Some homes have Ethernet cables between rooms, or you might install a cable from your modem out to a sleepout, shed or garage. Once the cable is installed, follow these instructions:
- Connect one end of the LAN cable to the rear of your modem and the other end to the WiFi Extender located in the area you want to cover with WiFi
- Plug the WiFi Extender into a power socket
- Wait for WiFi Quality and Connect LED lights to light up
- Press the Connect button on the WiFi Extender, the Connect LED will start flashing fast
- Go to where your broadband modem is located and, depending on your modem model, press the WLAN/WPS or Connect/WPS button
- The two devices will now link together.
You can put more than one WiFi Extender in a single network to communicate with each other and optimise the network range for large buildings or those on multiple floors.
- Plug the additional WiFi Extender into a power socket and turn on
- Wait for 1–2 mins for the Connect light to flash slowly
- Press the Connect button for six seconds (one, one thousand, two, one thousand, three, one thousand, four, one thousand, five one thousand, six one thousand)
- The Connect light will start to flash
- Go to the Extender already connected on your network and press the Connect button once
- Wait for the additional Extender to have stable WiFi and Connect lights
- On your modem, press the Connect button again once, and the WPS/Connect or WLAN/WPS (depending on your modem model) once to complete setup of the additional Extender into your Mesh WiFi network.
